The common cold for humans is the horse equivalent of an abscess. Some horses are more prone to them than others. I have a grulla paint mare that I have owned for just over a year, and in that course of a year, she has had a few abscesses. I have gotten pretty good in treating these things so I am going to share a little about an abscess and what some symptoms and treatment options are.
To start off if you don’t know what an abscess is, it occurs when bacteria invades the horse's hoof and is most noticeable when it infects the sensitive parts of the foot. They can cause serious damage if left untreated. What are some symptoms of an abscess you may ask? Well, the most common and noticed symptom is lameness and limping. This is in result to the invasion of the bacteria into the sensitive spots in the hoof.
However, there are a few more things that you can pick up on that are preliminary to an abscess. These include but are not limited to: fever, swelling of the leg and hoof area, sensitivity to hoof picks, and touch. If you notice your horse displaying any of these behaviors they probably have an abscess.
Fear not! These can be treated fairly easy. The easiest and fastest relief for your horse from an abscess is to have your vet or farrier come out and find the location of the infection of it has not broken through and trim a hole/path for the infection to drain out. However, some abscesses erupt and break through on their own, not needing to have a hole/path cut to drain them.
Once it is broke through and draining it is important to keep this area clean. Some people soak the foot in Epsom salts this is known the draw the infection out of the foot. This can be easily done by purchasing a soaking boot from your local tack store. These make the soaking process so much easier! Have you ever tried to get your horse to put its foot into a bucket to soak? Well, good luck, that’s a job in itself! Trust me the soak boots are a simple solution to a bigger potential headache.
What causes abscess and how can they be prevented? Well, the most common cause is an irritation to the sole of the foot most commonly from a stone or something of that nature getting stuck in the foot. It can even be as simple as a bruise from a stone/rock from trail riding. Aside from that, another common cause is moisture whether there be too much or too little moisture. Finally, dirty stalls are horrible for horse’s feet and can bring about abscesses.
If you pay attention and do your best to maintain healthy hoof care you should be fine. However, if your horse does get an abscess, just be sure to treat it accordingly and get it taken care of quickly.
Showing posts with label do it yourself. Show all posts
Showing posts with label do it yourself. Show all posts
Wednesday, April 19, 2017


Tuesday, October 9, 2012
Walking the Line: The Importance of Fence Selection for Horse Safety
Many horse owners will agree that nothing sends one’s heart into your throat quicker than learning your horses have breeched the pasture or paddock fencing and are wandering, unprotected, along a busy road front or are running loose in the community. The safety of your horses is only as certain as the ability of your fencing to keep them safely confined within the realm of their enclosure.
Several types of fencing are available, each with their own strengths, weaknesses, and dangers, along with optimum uses to meet the requirements of the area to be fenced. No fence type is 100% safe or escape resistant; however, coupling the appropriate fencing structure with the dynamics of the area to be fenced will ensure you are providing the best barrier protection for the safety of your horses.
When selecting fencing structures, keep in mind what the fence must provide: function (keeping the horses confined), safety, and eye appeal. In my home state of Kentucky, mile after rolling mile of pasture is fenced with black or white wooden, double and perimeter, 4-or-5-rail fencing. This type of fencing structure ranks foremost in meeting the three criteria defined above; however, it is also the most costly to construct and maintain; therefore, it may not be financially feasible for all. Horses recognize the strength of the wooden rails and will learn about its durability when they “test” it. Attaching the rails on the “horse side” of the fence will easily bear the weight and prevent fasteners from being loosened. The rails are highly visible to horses, and minimize run-through incidents, while well-placed boards (12” between rails and 8” from the ground) prevent hoof and leg entanglements. Perimeter fencing provides the added security that if a horse does escape from a pasture or paddock, it is still confined within the property by the perimeter fence.
Rail fences are most often made of treated 2” x 6” oak or pine planks, varied in length between 8-to-12 feet, and are constructed to a height of 5 feet (5 rail) for pasture fencing or 4 ½ feet (4 rail) for paddock fencing. Treated wood provides a longer life span for the wood and deters horses from chewing it. Painting provides an added barrier against damage and may increase the service life of the wood. Fence lines are easily accessible for clearing and cleaning. Over time, wooden rails and posts will decay and will require replacement to protect the integrity of the fencing structure.
In the event of a barrier charge, breaking and splintering of the wooden rails may occur and can cause serious injury to horses; however, most horses respect this fencing structure and breeches predominantly occur because of a flight-or-fight response or a physical altercation between two horses in adjacent pastures that choose their battleground over the fence. Double fencing will prevent such contact. These barriers should be constructed with removable rails and be wide enough to allow access for mowing and other maintenance requirements.
If a rail fence is preferred, but the combined expense of wooden rails and maintenance is too costly, you may choose to use vinyl plastic fencing or vinyl coated wood. While the purchase price of vinyl fencing may be more than wooden rails, the upkeep proves to be less costly in money and maintenance as painting is not required, although periodic pressure washing with an anti-mildew agent is necessary. Vinyl railing is not as strong as wooden rails and may be damaged when a horse leans into or rubs against it. Sustained injuries and their resultant severity may be reduced as the vinyl rails will not splinter and produce jagged ends when broken. The overall structural integrity of vinyl fencing may be compromised and weakened when adjacent railed sections are damaged; therefore, it may be prudent to closely inspect the fencing system any time such damage is sustained. Vinyl coated wood rails have the same properties of painted or treated wooden rails, yet offer the same maintenance requirements as vinyl plastic rails.
Various wire component fencing options and derivatives of wire and vinyl are available and may be more cost-conducive to farm and horse owners. Wire fencing may also better suit the terrain on some farms.
Woven wire fences are the most conventional and least expensive of wire fencing structures. Constructed of 4-to-6 inch square “woven” segments, the wire stretched between and affixed to wooden or metal posts that are separated at distances between 8-to-12 feet. As with the wooden rail fence, the wire should be affixed to the posts on the “horse side” of the fence to better withstand any “testing”. A 3” ground clearance should be afforded to prevent horses from walking the fence down. If ground clearance is too high, horses will attempt to graze under the fence and risk becoming entangled, potentially injuring themselves and damaging the fence. Further damage may occur as horses hang their heads over the top and press down, causing slack between the posts and “crumpling” the fence by bending the weaves. Mashing can be abated by running a wooden rail across the top and affixing the woven wire to the rail. The inclusion of a single electric wire inside of the wooden rail will provide added protection. Tight tensioning will prevent horses from loosening the bottom of the fence. Maintenance requires replacement of the wooden poles that may be damaged or weakened by rot and re-tightening fencing segments between poles. It is important to keep the fence line clear of vegetation, as unabated growth can weaken the structure.
Diamond patterned mesh wire fencing, a type of woven wire, is ideal for keeping out transient animals, such as dogs, skunks, opossums, ground hogs, etc. Although this fencing proves more costly than conventional woven wire, the small diamond-shaped opening prevents hoof entanglement and is safer for use with horses, which may well be worth the investment if woven wire is your best option.
The most basic of the wire fences is the electric fence that, in essence, provides a psychological barrier of a sudden high voltage, yet harmless, electrical shock to a horse when it is touched. Most horses (and humans) quickly learn to respect the fence and lose their desire to purposefully risk an encounter. Although, there are some who learn that the barrier can quickly be broken as the resultant shock is minimal in duration.
Many styles of electrical fencing are available, from its simplest form of a single smooth wire strand, to more graduated types which include vinyl coated wire, poly rope wire, and poly tape. Electric fences should consist of no fewer than two strands, with greater barrier protection being afforded to three or more strands, with five strands being optimal. Utilizing a five strand electric fence with alternating hot/cold (ground) wires will provide optimal current to the fence as the cold wires allow for circuitous flow of electricity back to the charger.
Poly rope and poly tape wire provide a visible barrier; however, vinyl coated and smooth wire may need to have cloth ribbons tied to the top strand to provide horses with visible evidence of the fenced boundaries. Electric fencing is most likely the easiest form of fencing to breech, and with the use of smooth electric wiring may cause the most serious of injuries, as wire entanglements will cut deeply into flesh. Because of the greater likelihood of injury, electric wire fencing should never be used for small enclosures.
Maintenance issues are minimal with this type of fencing, although it is recommended that daily checks be made to ensure the charger is working to power the fence. Routine mowing should be done to prevent contact and grounding out by grasses and weeds that have grown tall enough to touch the bottom line.
High tension wire is less costly than other types of fencing and could be a good option based upon the durability of galvanized wire, which resists rusting, and the fact that the fence can be run greater distances (up to 20 feet) between posts, resulting in fewer fence posts needed. As its name implies, this type of wire may prove to be high maintenance as a result of the effects of temperature variations. High temperatures cause the wire to expand, resulting in slack fencing, and cold temperatures cause the wire to contract and over-tighten, which may result in damage to fence posts.
Poly-coated high tension wiring is available to provide for visibility; however, grievous injuries have been sustained by horses that have become entangled in high tension wire. A safety feature has been built in to immediately release the tension in the event of entanglement.
High tension wire can be electrified to further prevent contact from horses, and may provide the better option for your horses’ safety should you choose to use this type of fencing. Electrifying the wire would require the use of a coated wire to better conduct the electricity.
Regardless of the type of fencing you have or may choose to secure the safety of your horses, regular inspection is required to identify problems before they become catastrophes. With each step of “walking the line” of your fencing, you can rest easily at night knowing your horses are safely enclosed behind a secure barrier, separating them from harm and protecting you from loss.
Happy trails!
By: Darlene M. Cox (darlc5@aol.com)
Several types of fencing are available, each with their own strengths, weaknesses, and dangers, along with optimum uses to meet the requirements of the area to be fenced. No fence type is 100% safe or escape resistant; however, coupling the appropriate fencing structure with the dynamics of the area to be fenced will ensure you are providing the best barrier protection for the safety of your horses.
When selecting fencing structures, keep in mind what the fence must provide: function (keeping the horses confined), safety, and eye appeal. In my home state of Kentucky, mile after rolling mile of pasture is fenced with black or white wooden, double and perimeter, 4-or-5-rail fencing. This type of fencing structure ranks foremost in meeting the three criteria defined above; however, it is also the most costly to construct and maintain; therefore, it may not be financially feasible for all. Horses recognize the strength of the wooden rails and will learn about its durability when they “test” it. Attaching the rails on the “horse side” of the fence will easily bear the weight and prevent fasteners from being loosened. The rails are highly visible to horses, and minimize run-through incidents, while well-placed boards (12” between rails and 8” from the ground) prevent hoof and leg entanglements. Perimeter fencing provides the added security that if a horse does escape from a pasture or paddock, it is still confined within the property by the perimeter fence.
Rail fences are most often made of treated 2” x 6” oak or pine planks, varied in length between 8-to-12 feet, and are constructed to a height of 5 feet (5 rail) for pasture fencing or 4 ½ feet (4 rail) for paddock fencing. Treated wood provides a longer life span for the wood and deters horses from chewing it. Painting provides an added barrier against damage and may increase the service life of the wood. Fence lines are easily accessible for clearing and cleaning. Over time, wooden rails and posts will decay and will require replacement to protect the integrity of the fencing structure.
In the event of a barrier charge, breaking and splintering of the wooden rails may occur and can cause serious injury to horses; however, most horses respect this fencing structure and breeches predominantly occur because of a flight-or-fight response or a physical altercation between two horses in adjacent pastures that choose their battleground over the fence. Double fencing will prevent such contact. These barriers should be constructed with removable rails and be wide enough to allow access for mowing and other maintenance requirements.
If a rail fence is preferred, but the combined expense of wooden rails and maintenance is too costly, you may choose to use vinyl plastic fencing or vinyl coated wood. While the purchase price of vinyl fencing may be more than wooden rails, the upkeep proves to be less costly in money and maintenance as painting is not required, although periodic pressure washing with an anti-mildew agent is necessary. Vinyl railing is not as strong as wooden rails and may be damaged when a horse leans into or rubs against it. Sustained injuries and their resultant severity may be reduced as the vinyl rails will not splinter and produce jagged ends when broken. The overall structural integrity of vinyl fencing may be compromised and weakened when adjacent railed sections are damaged; therefore, it may be prudent to closely inspect the fencing system any time such damage is sustained. Vinyl coated wood rails have the same properties of painted or treated wooden rails, yet offer the same maintenance requirements as vinyl plastic rails.
Various wire component fencing options and derivatives of wire and vinyl are available and may be more cost-conducive to farm and horse owners. Wire fencing may also better suit the terrain on some farms.
Woven wire fences are the most conventional and least expensive of wire fencing structures. Constructed of 4-to-6 inch square “woven” segments, the wire stretched between and affixed to wooden or metal posts that are separated at distances between 8-to-12 feet. As with the wooden rail fence, the wire should be affixed to the posts on the “horse side” of the fence to better withstand any “testing”. A 3” ground clearance should be afforded to prevent horses from walking the fence down. If ground clearance is too high, horses will attempt to graze under the fence and risk becoming entangled, potentially injuring themselves and damaging the fence. Further damage may occur as horses hang their heads over the top and press down, causing slack between the posts and “crumpling” the fence by bending the weaves. Mashing can be abated by running a wooden rail across the top and affixing the woven wire to the rail. The inclusion of a single electric wire inside of the wooden rail will provide added protection. Tight tensioning will prevent horses from loosening the bottom of the fence. Maintenance requires replacement of the wooden poles that may be damaged or weakened by rot and re-tightening fencing segments between poles. It is important to keep the fence line clear of vegetation, as unabated growth can weaken the structure.
Diamond patterned mesh wire fencing, a type of woven wire, is ideal for keeping out transient animals, such as dogs, skunks, opossums, ground hogs, etc. Although this fencing proves more costly than conventional woven wire, the small diamond-shaped opening prevents hoof entanglement and is safer for use with horses, which may well be worth the investment if woven wire is your best option.
The most basic of the wire fences is the electric fence that, in essence, provides a psychological barrier of a sudden high voltage, yet harmless, electrical shock to a horse when it is touched. Most horses (and humans) quickly learn to respect the fence and lose their desire to purposefully risk an encounter. Although, there are some who learn that the barrier can quickly be broken as the resultant shock is minimal in duration.
Many styles of electrical fencing are available, from its simplest form of a single smooth wire strand, to more graduated types which include vinyl coated wire, poly rope wire, and poly tape. Electric fences should consist of no fewer than two strands, with greater barrier protection being afforded to three or more strands, with five strands being optimal. Utilizing a five strand electric fence with alternating hot/cold (ground) wires will provide optimal current to the fence as the cold wires allow for circuitous flow of electricity back to the charger.
Poly rope and poly tape wire provide a visible barrier; however, vinyl coated and smooth wire may need to have cloth ribbons tied to the top strand to provide horses with visible evidence of the fenced boundaries. Electric fencing is most likely the easiest form of fencing to breech, and with the use of smooth electric wiring may cause the most serious of injuries, as wire entanglements will cut deeply into flesh. Because of the greater likelihood of injury, electric wire fencing should never be used for small enclosures.
Maintenance issues are minimal with this type of fencing, although it is recommended that daily checks be made to ensure the charger is working to power the fence. Routine mowing should be done to prevent contact and grounding out by grasses and weeds that have grown tall enough to touch the bottom line.
High tension wire is less costly than other types of fencing and could be a good option based upon the durability of galvanized wire, which resists rusting, and the fact that the fence can be run greater distances (up to 20 feet) between posts, resulting in fewer fence posts needed. As its name implies, this type of wire may prove to be high maintenance as a result of the effects of temperature variations. High temperatures cause the wire to expand, resulting in slack fencing, and cold temperatures cause the wire to contract and over-tighten, which may result in damage to fence posts.
Poly-coated high tension wiring is available to provide for visibility; however, grievous injuries have been sustained by horses that have become entangled in high tension wire. A safety feature has been built in to immediately release the tension in the event of entanglement.
High tension wire can be electrified to further prevent contact from horses, and may provide the better option for your horses’ safety should you choose to use this type of fencing. Electrifying the wire would require the use of a coated wire to better conduct the electricity.
Regardless of the type of fencing you have or may choose to secure the safety of your horses, regular inspection is required to identify problems before they become catastrophes. With each step of “walking the line” of your fencing, you can rest easily at night knowing your horses are safely enclosed behind a secure barrier, separating them from harm and protecting you from loss.
Happy trails!
By: Darlene M. Cox (darlc5@aol.com)
Sunday, July 1, 2012
Bidding Adieu to Poo – Composting Horse Manure
 If you have horses, you most certainly have an abundance of manure. Most horse folk probably look at dealing with this odorous offal as the price one must pay when having horses. The truth is, however, horse manure can be a beneficial resource for your farm and could possibly put some greenbacks in your hand as well.
There are many benefits to composting horse manure. The health of your horses can be positively impacted because flies and parasites are killed off by the high temperatures in the compost pile. Your pasture benefits as well because weed seeds cannot survive through the high temps as well.
Removing manure from your pastures and adding to your compost will provide more grazing capacity. Horses avoid grazing near manure piles (can’t say that I blame them); however, they don’t seem to mind the presence of composted manure when lightly spread over the pasture to encourage good grass growth by supplying rich nutrients to the soil.
The easiest way to compost is to build two composting bins which can be done easily and inexpensively, to store your compost. All that is required are landscape boards and lag screws to build a three-sided bin. Once the bin is full, it takes about two months for the composting process to be completed. It may be beneficial to build two bins where you can have a fresh compost bin and a completed bin.
When establishing your compost pile, you want to select an elevated spot that is not located near a water source. A well-managed compost pile will break down the manure quickly and will reduce the bulk that you would otherwise have on hand without composting. Odors are also diminished by composting, simply due to the natural process of the manure breaking down. It is important to try to keep foreign matter out of your compost pile. Some stall bedding (straw) composts quicker than others (sawdust).
The success of your compost pile relies on two important things: Heat and air movement. Optimal heating levels are achieved by having a pile that is at least three feet high. Heat is obtained from decomposition and internal combustion as the manure breaks down. Air movement is easily achieved by using your tractor to turn the pile and moving the outside compost to the inside of the pile. Moving the pile allows air to reach all areas and provides the fuel for combustion. If you don’t have a tractor, you can insert several PVC pipes, with holes drilled through them, down through the pile to provide air flow.
The temperature of your compost pile will vary through composting cycle. The range is generally between (100 degrees to 120 degrees on the lower end and rising to around 130 – 150 degrees to effectively kill off fly and parasite eggs. The temperature of the pile will drop when composting is nearing completion.
Water is also an important component for your pile; however, you don’t want too much of it. Too much water will limit the amount of air flow and will cause odors. Covering your pile may be necessary during any wet periods. You also don’t want your pile to be too dry. Compost should have about as much moisture as you might find in peat moss; somewhat damp, but not dripping.
Composted horse manure is a marketable commodity and can easily be sold to landscapers, plant nurseries, topsoil companies, or to your neighbors who want to use it to enrich their gardens. Contact some of these businesses to see if they may be interested in buying your compost. The money you make from it can then be put back into your horse operation. You will find that the work involved in maintaining your compost pile is minimal compared to the benefits you receive from it.
Happy trails!
By: Darlene M. Cox (darlc5@aol.com)
Thursday, June 9, 2011
Cake for Horse Lovers

We recently added Breyer Toys to our lineup of new products on HorseSaddleshop.com. While I was adding the toys to the store online, a certain little saddle-expert-in-training noticed these exquisite hand-painted horses. "You have enough toys," I replied. A few days later we were together at HorseSaddleShop Outlet and she sought them out to sigh over them. It's true that the pictures don't do them justice. Breyer toys aren't like the horses you'll find at the dollar store, with paint hardly splotched in the right places---the type of toys you're only too glad to throw in the Goodwill pile because you're sick of stepping on them. These horses are very realistic and, for lack of a better word, compelling. Everything from the hair on their manes to the muscles on their legs is perfectly formed.
But we still didn't buy any. :) However, my little horse lover is persistent. A few weeks later I asked her to pick out what kind of cake she wanted for her birthday. She tracked down a cake that looks like a pasture, complete with plastic horses. Then she sweetly reminded me where I could buy some.

I gave in. The Stablemate series is the perfect size for cake toppers, around four inches long by three inches high. The hardest part for me was choosing which horses, but I finally narrowed it down to the mustang and the quarter horse. The cake was a cinch to slap together, and my
daughter was extremely pleased to finally add some Breyer horses to her collection. If you'd like to make a cake for your horse lover, instructions follow. This would be especially fun to model after your own pasture.
1. Make a cake of the flavor of your choice. Use a 8 or 9 inch
round or square cake pan. I chose to make chocolate so that any crumbs that showed through would just look like dirt.
2. Color homemade or canned frosting grass green. Using Wilton's gel-based food coloring will produce a stronger color than the liquid.
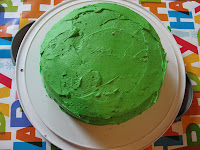
4. Use some green food coloring to color some coconut. Sprinkle the top of the cake to make grass.

5. Use some decorating tips to recreate whatever weeds....oh, I mean flowers are in your pasture.

5. Use pretzel sticks to create a fence.

6. Add your horses. Resist the urge to play with them yourself.

If you make your own pasture cake, don't forget to share the pics with us on our Facebook page!
Tuesday, February 16, 2010
Say 'Whoa' to Winter Woes: Money and Time Saving Tips
This article is taken from our February newsletter. It's chock full of horse care tips, helpful articles, and coupon codes! Click here to subscribe.
By: Darlene M. Cox, darlc5@aol.com
We are definitely in the grip of winter as Mother Nature blows cold arctic air down upon us, bringing with it the beautiful, yet burdensome, snowfalls. While spring will most certainly arrive, we must persevere to get through winter. Undoubtedly, barn chores take longer to do during the winter months when you factor in the multiple layers of clothes you must dress in, snow drifts that may need to be navigated around, frozen ice buckets and troughs to be cleared, and mucky mud pits at barn entrances that are just waiting to suck the boots right from your feet.
Yes, it is definitely no picnic dealing with the daily care of our horses during this cold and blustery season, but there are things you can do to save a little money and time:
· Reduce the cost of your farrier expenses by pulling shoes from your horse during the off season. This will allow some resting time for your horse's feet and keep some money in your pocket. Also, you may not need to have your farrier come out every six weeks, as hooves grow slower during winter months. An added health/safety bonus in keeping your horse unshod during winter is that snowballs will not accumulate on his feet, which will reduce tendon injuries. If you have a horse that must remain shod, consider using Vaseline petroleum jelly or shortening on the soles to keep snowballs from accumulating. You could also have your farrier place some snow pads under the shoes.
· Prevent plumbing expenses and the hassle of having to haul water in by wrapping exposed water pipes with heat tape or a pipe sleeve. For really frigid nights, you may want to let your water nozzle drip into a bucket to keep pipes from freezing. Disconnect hoses, because water will back flush from the hose to the water pipe and freeze.
· Provide your horse with ample paddock time. Unless the weather is particularly bad, your horse will prefer to be outside and not stuck in his stall. This will save you time and expense of having to clean stalls as often.
· Prevent icy build-up in watering buckets and troughs by using heated buckets or a heating element designed for troughs. Horses do not like to drink ice cold water and will not consume as much as they should, which my increase the chance of impaction colic. Feed your horse salt to encourage water consumption during winter months. If you do not have electricity at your barn, coat the inside of water buckets and troughs with vegetable oil, which will make the ice block slide out easier when dumping.
· Carpet remnants can be used to cover snow and ice covered paths and provide better traction for moving your horse between paddock and barn. You can also cut up carpet strips to keep in your truck to use for traction if you happen to get stuck in the snow. A carpet section can also be used to bring hay to your horses. Just place the bale or flakes on the carpet and drag it across the snow.
· Limit your exposure to the elements by pre-measuring the grain for the next feeding cycle. Prepare the evening feed, right after feeding the morning regimen, and then do the same preparation for the next morning's feed the night before.
· Save time on winter grooming by focusing only on badly soiled areas, such as bellies, feet, and legs. Grooming will flatten down your horse's hair coat, which will actually make them colder. Wait for a warmer day to do entire body grooming.
Dress warm, stay safe, and keep your eyes on the calendar for spring will definitely be here before you know it.
Happy trails!
By: Darlene M. Cox, darlc5@aol.com
We are definitely in the grip of winter as Mother Nature blows cold arctic air down upon us, bringing with it the beautiful, yet burdensome, snowfalls. While spring will most certainly arrive, we must persevere to get through winter. Undoubtedly, barn chores take longer to do during the winter months when you factor in the multiple layers of clothes you must dress in, snow drifts that may need to be navigated around, frozen ice buckets and troughs to be cleared, and mucky mud pits at barn entrances that are just waiting to suck the boots right from your feet.
Yes, it is definitely no picnic dealing with the daily care of our horses during this cold and blustery season, but there are things you can do to save a little money and time:
· Reduce the cost of your farrier expenses by pulling shoes from your horse during the off season. This will allow some resting time for your horse's feet and keep some money in your pocket. Also, you may not need to have your farrier come out every six weeks, as hooves grow slower during winter months. An added health/safety bonus in keeping your horse unshod during winter is that snowballs will not accumulate on his feet, which will reduce tendon injuries. If you have a horse that must remain shod, consider using Vaseline petroleum jelly or shortening on the soles to keep snowballs from accumulating. You could also have your farrier place some snow pads under the shoes.
· Prevent plumbing expenses and the hassle of having to haul water in by wrapping exposed water pipes with heat tape or a pipe sleeve. For really frigid nights, you may want to let your water nozzle drip into a bucket to keep pipes from freezing. Disconnect hoses, because water will back flush from the hose to the water pipe and freeze.
· Provide your horse with ample paddock time. Unless the weather is particularly bad, your horse will prefer to be outside and not stuck in his stall. This will save you time and expense of having to clean stalls as often.
· Prevent icy build-up in watering buckets and troughs by using heated buckets or a heating element designed for troughs. Horses do not like to drink ice cold water and will not consume as much as they should, which my increase the chance of impaction colic. Feed your horse salt to encourage water consumption during winter months. If you do not have electricity at your barn, coat the inside of water buckets and troughs with vegetable oil, which will make the ice block slide out easier when dumping.
· Carpet remnants can be used to cover snow and ice covered paths and provide better traction for moving your horse between paddock and barn. You can also cut up carpet strips to keep in your truck to use for traction if you happen to get stuck in the snow. A carpet section can also be used to bring hay to your horses. Just place the bale or flakes on the carpet and drag it across the snow.
· Limit your exposure to the elements by pre-measuring the grain for the next feeding cycle. Prepare the evening feed, right after feeding the morning regimen, and then do the same preparation for the next morning's feed the night before.
· Save time on winter grooming by focusing only on badly soiled areas, such as bellies, feet, and legs. Grooming will flatten down your horse's hair coat, which will actually make them colder. Wait for a warmer day to do entire body grooming.
Dress warm, stay safe, and keep your eyes on the calendar for spring will definitely be here before you know it.
Happy trails!
Thursday, July 23, 2009
Make Your Own Fly Trap: Death to the Pests!
I, Stephanie, have a personal vendetta against flies. I can't stand the way they sound. I can't stand the way they look---all hairy and buggish. I can't stand the way they relentlessly bother our equine friends. Which is why I'm delighted to bring you a cheap, quick death trap for these abominable pests. Hang a few in your barn and your fly population will swiftly decrease. Now if you have a tender heart toward insects, there are fly traps you can make where the flies are humanely trapped, not killed. Then I suppose you'd drive them to the nearest state park and set them free to frollick among the lilies. Me, I'm all for disposing of as many as possible.
To make your own fly trap, all you'll need is the following:

Empty 2 liter bottle, heavy scissors or knife, duct tape, 24inch long piece of twine or rope

For the bait: Dish soap, water (I used freshly filtered. See? I'm providing the best for their last moments upon the earth. Now excuse me while I pat myself on the back.) You'll also need vinegar, sugar, and a banana. Mine came out of the freezer. What? Doesn't everyone have half a dozen black bananas in their freezer? You can also just use a chunk of raw meat, but....ew.
To begin, take the label off your bottle and using scissors or a knife, cut the top of the bottle right were the top of the lable was.

Now stir in 1/2--1 cup sugar, 1/4 cup vinegar, a couple drops of dish soap, one banana peel (you can throw the fruit in if you're feeling generous. Me? I'm making banana bread.) Add two cups of warm water and give it a good stir.

Take the top of the bottle that you cut off, place it spout down over the bait, line up the edges, and duct tape the layers together. Use your scissors to poke two holes on opposite sides of the bottle, then take your twine and tie knots to secure. Your finished trap should look like this:

Hang your traps in the barn and dispose of them when you deem them full. Your horses will thank you. And until flies are on the endangered species list and I develop a conscience about killing them, I will too.
Anyone have more tips on fly control?
Subscribe to:
Posts (Atom)